
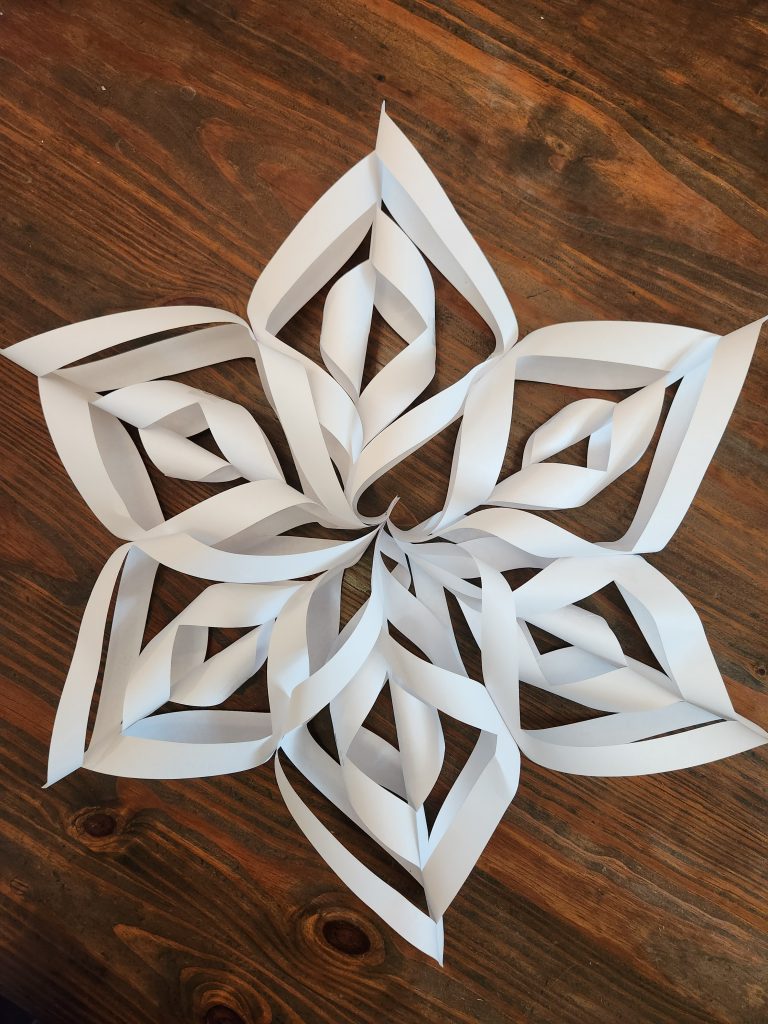
Try this fun winter inspired 3-D snowflake craft to decorate and spruce up your walls while working on fine motor, visual motor, and executive functioning skills. Follow the steps below.
Step 1: Gather materials.
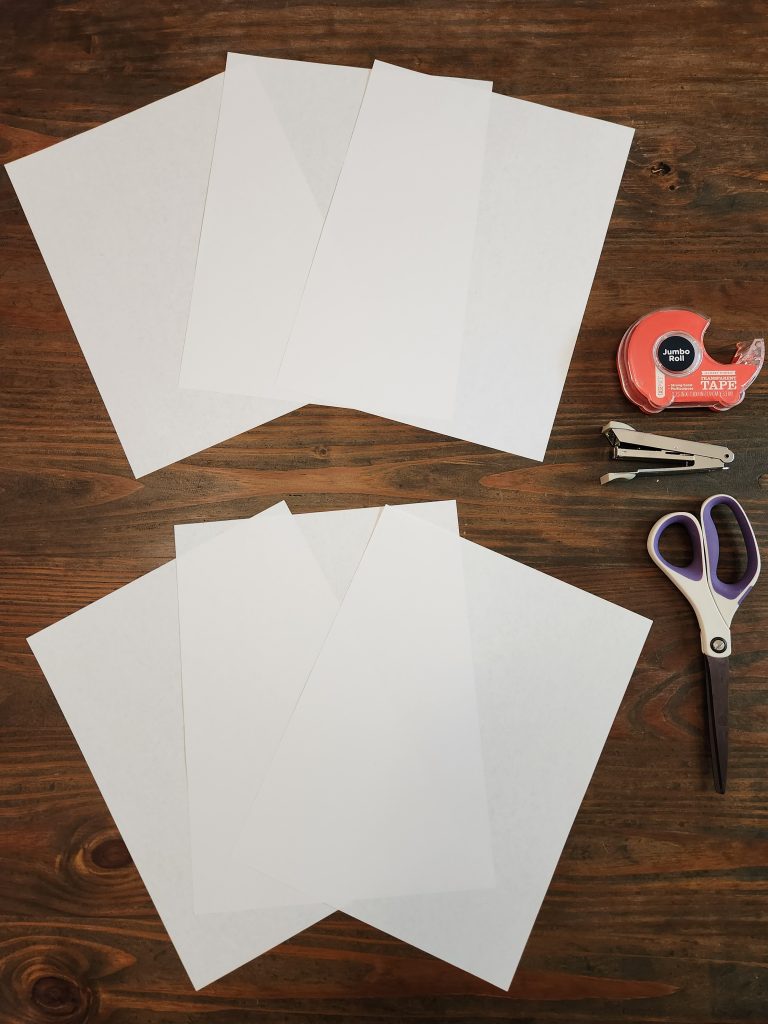
- 6 sheets of white multipurpose paper (add color for variety).
- Stapler with staples
- Scissors
- Clear tape
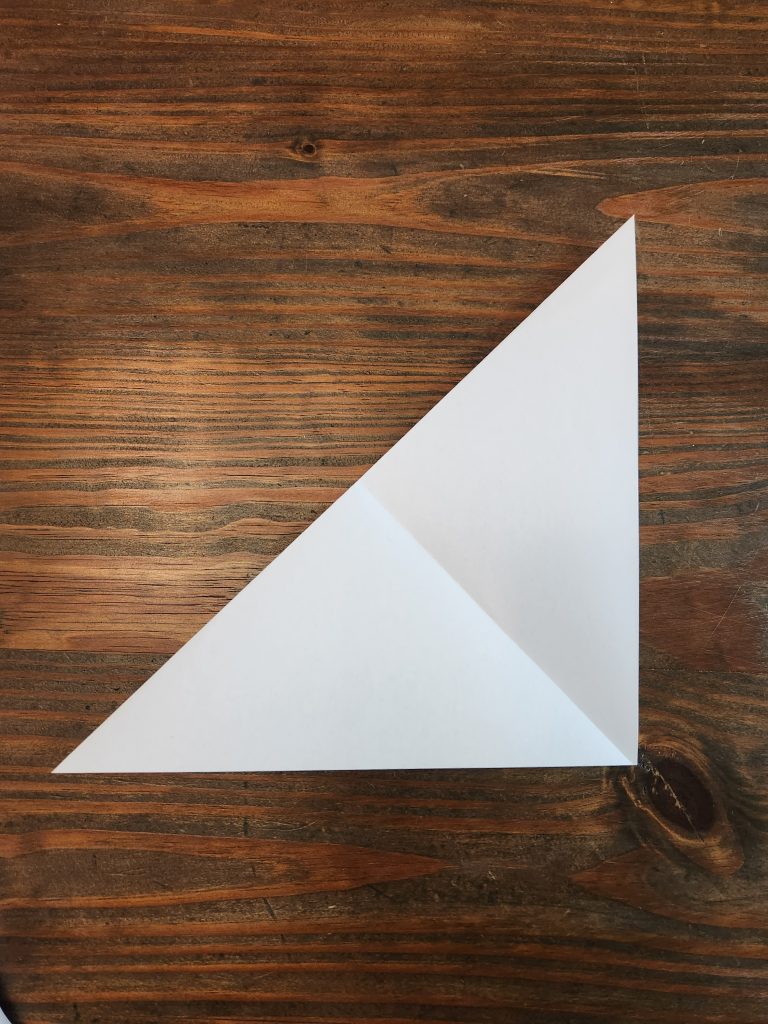
Step 2: Fold and cut.
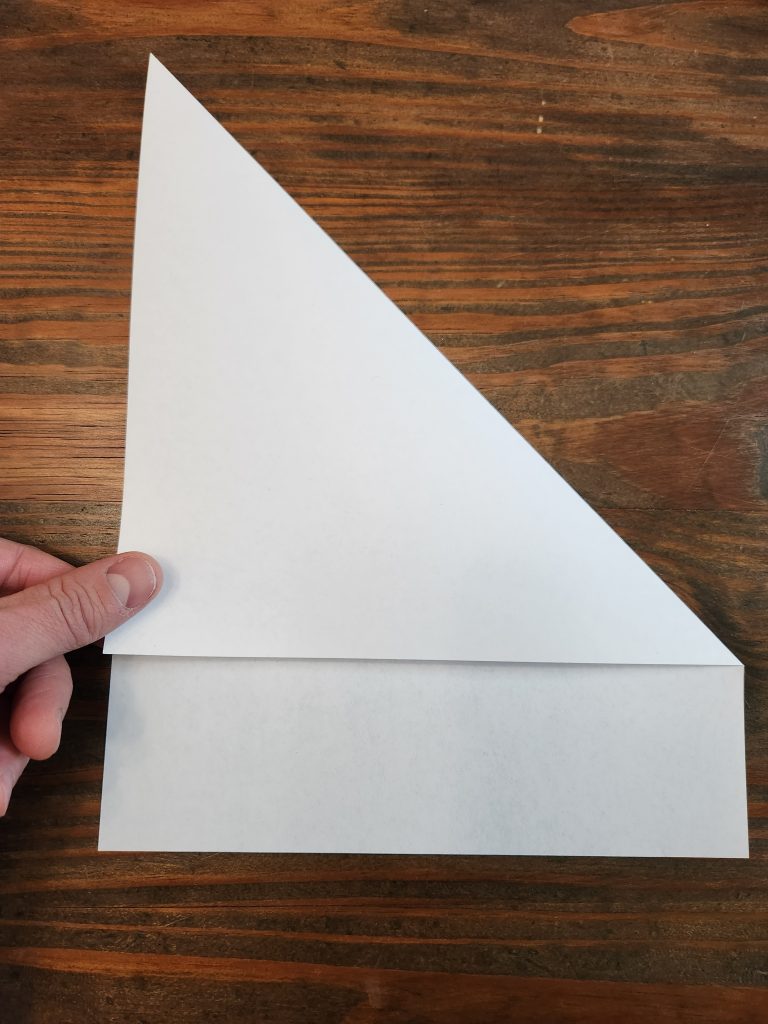
- Use one sheet of paper.
- Fold the top corner to the opposite side of the sheet as pictured in the 1st image.
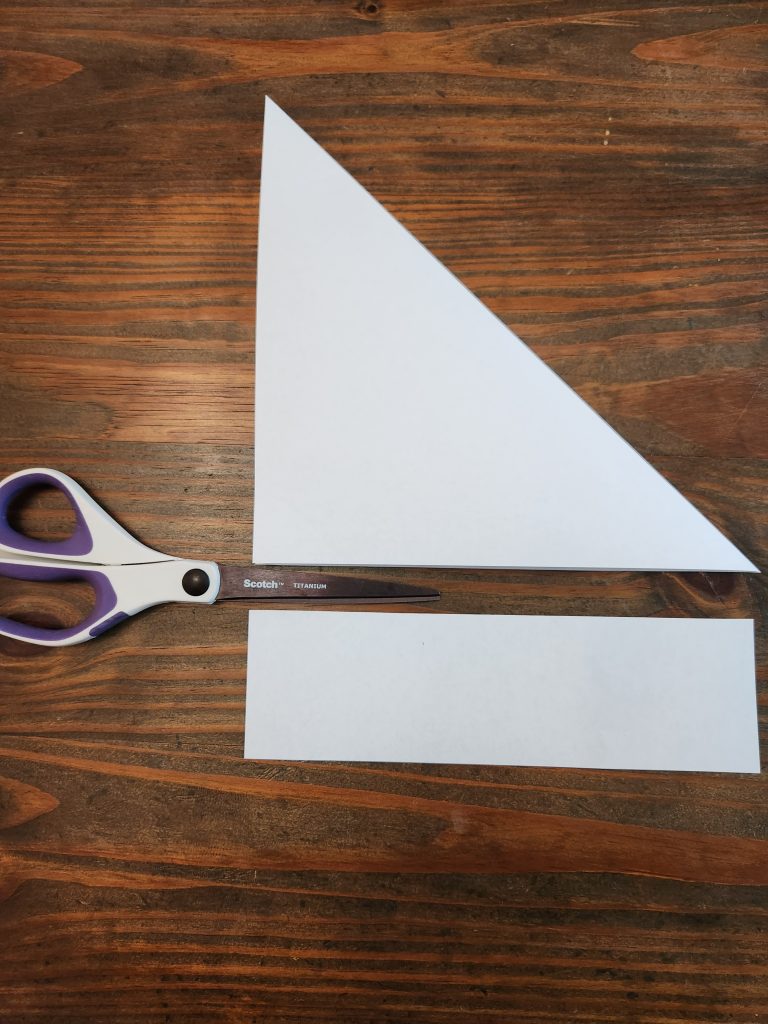
- Cut off the excess paper (rectangular strip) as pictured in the 2nd image to form a square.
- Keep the paper in this triangular shape.
Step 3: Folding the snowflake section.
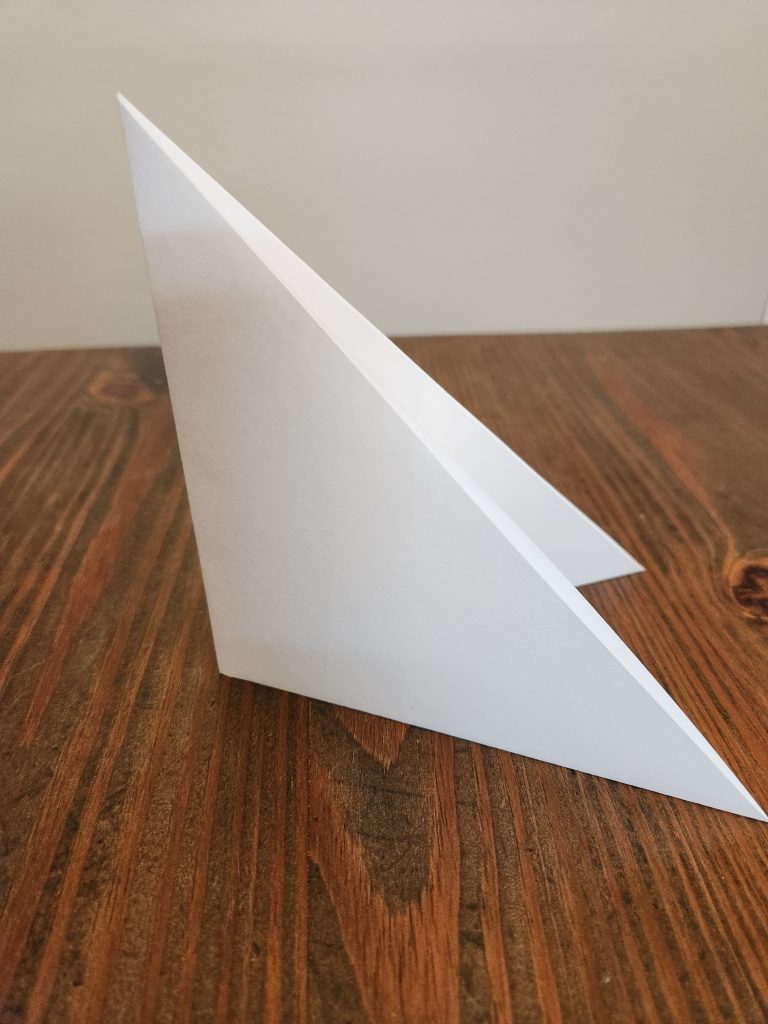
- Fold the triangle in half 1 more time.
- Orient the triangle upright in a 90-degree fashion, with the “legs” of the triangle on the bottom as seen in the 2nd image.
Step 4: Cutting the snowflake section.

- Cut a diagonal line from the bottom of the triangle to the “spine,” or vertical side, cutting parallel to the “hypotenuse,” or angled side of the triangle.
- Cut 2 more diagonal parallel lines descending in order toward the 90-degree corner as pictured in the image.
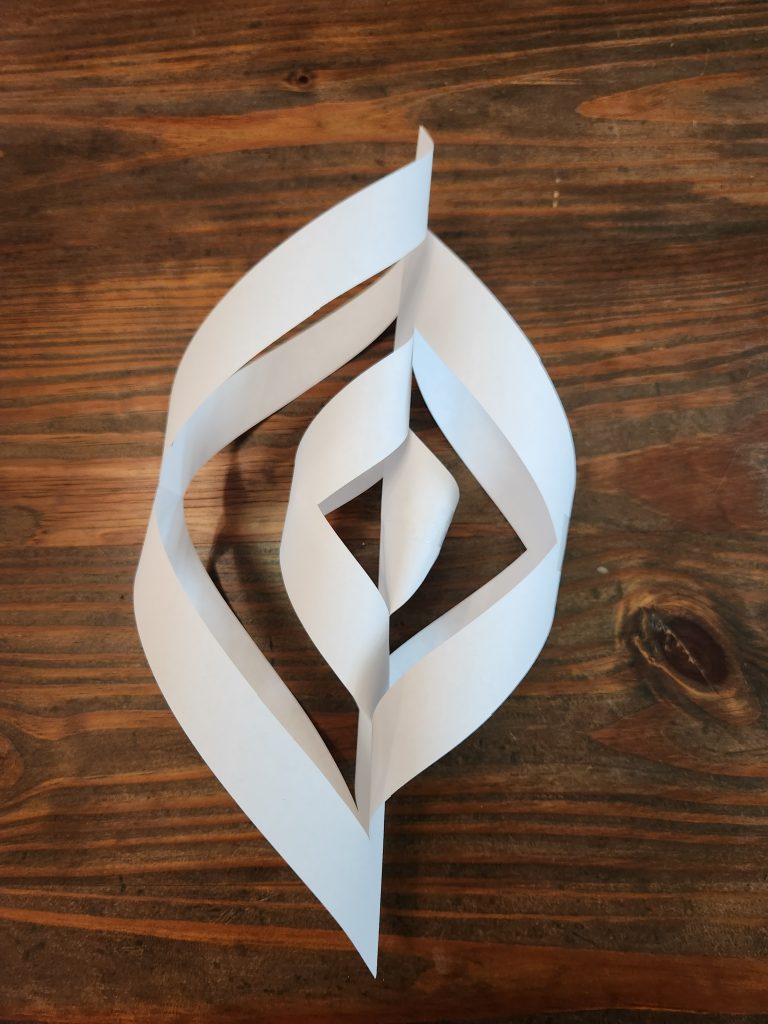
Step 5: Unfold to prepare for taping.
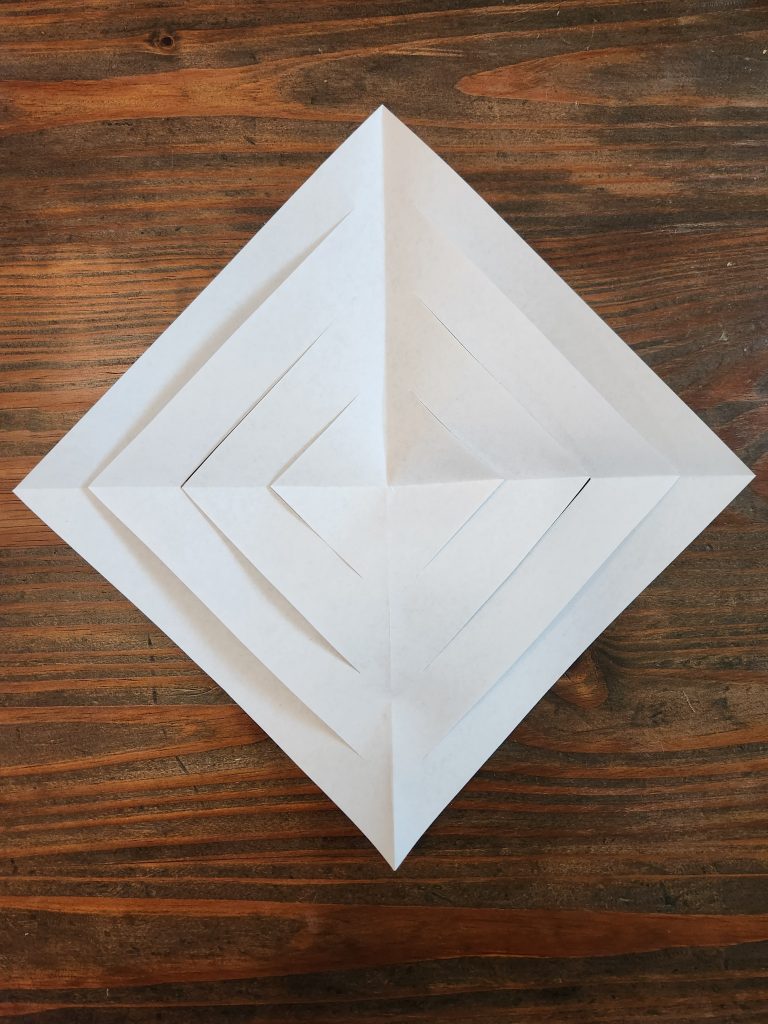
- Unfold the paper to reveal a square or “diamond” as pictured in the image.
Step 6-9: Taping flaps to complete snowflake section.

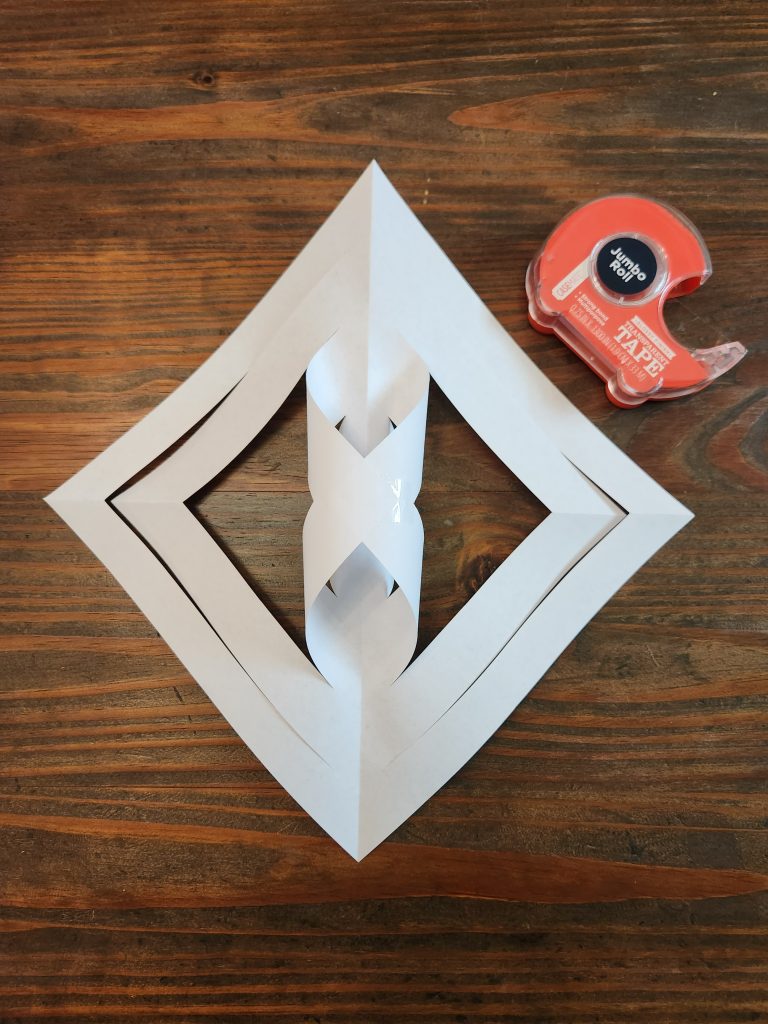
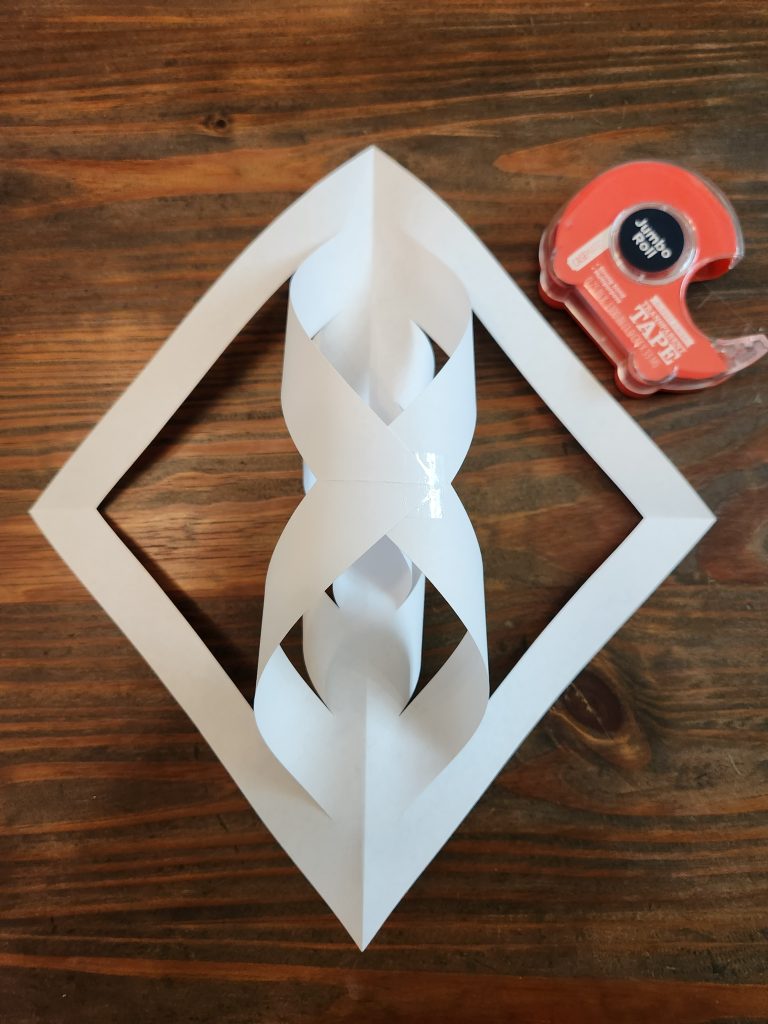
- Tape the inner flaps together, overlapping the ends into a cylindrical fashion as pictured above.
- Flip the paper to the opposite side.
- Tape the next 2 flaps together, overlapping in a cylindrical fashion as pictured in the above image.
- Flip the paper back to the other side.
- Tape the 3rd flaps together, overlapping in a cylindrical fashion as pictured above.
- Flip the paper back to the other side.
- Tape the final outer flaps together, overlapping in a cylindrical fashion as pictured above.
- This is a complete section of the snowflake, 1 of 6.
Step 10: Assembling snowflake sections.

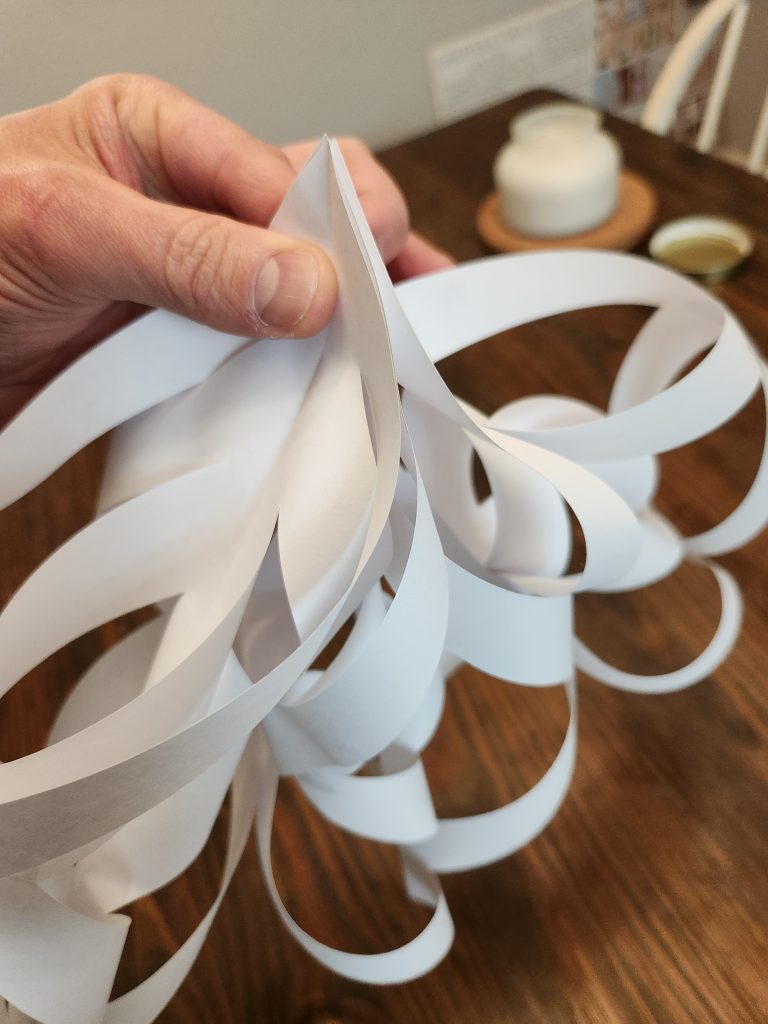
- Make 6 snowflake sections.
- Gather each of the 6 snowflake sections by pinching and aligning them at their tips as seen in the images.
- Staple them together.
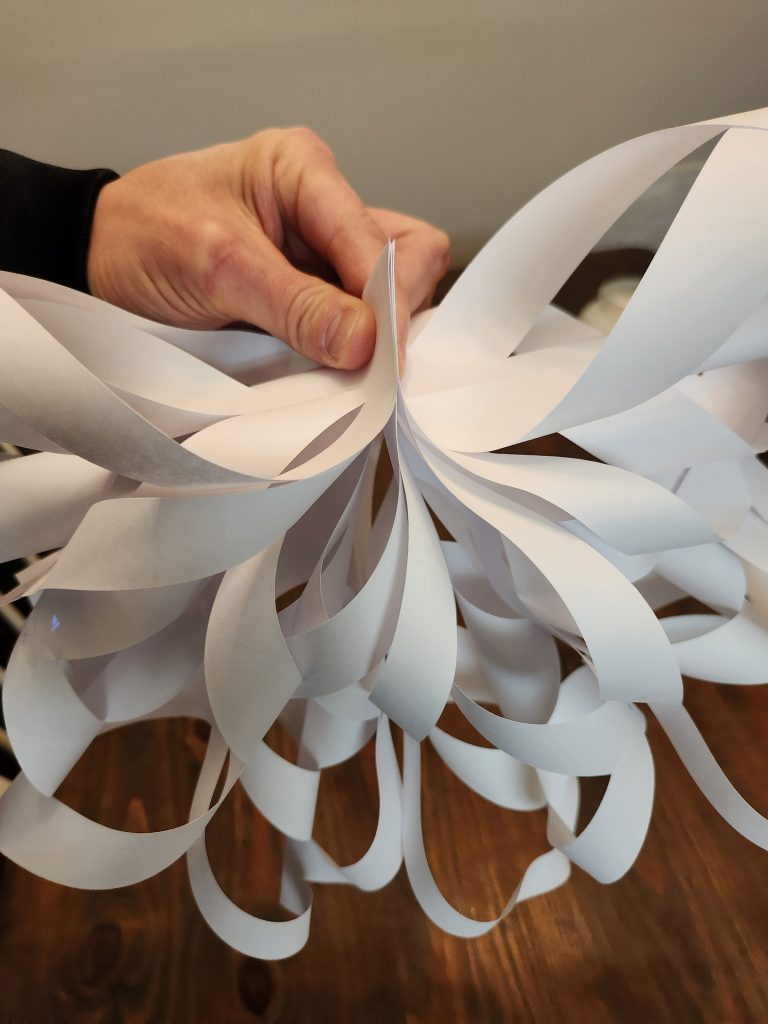
Step 11: Final stapling to secure the snowflake.
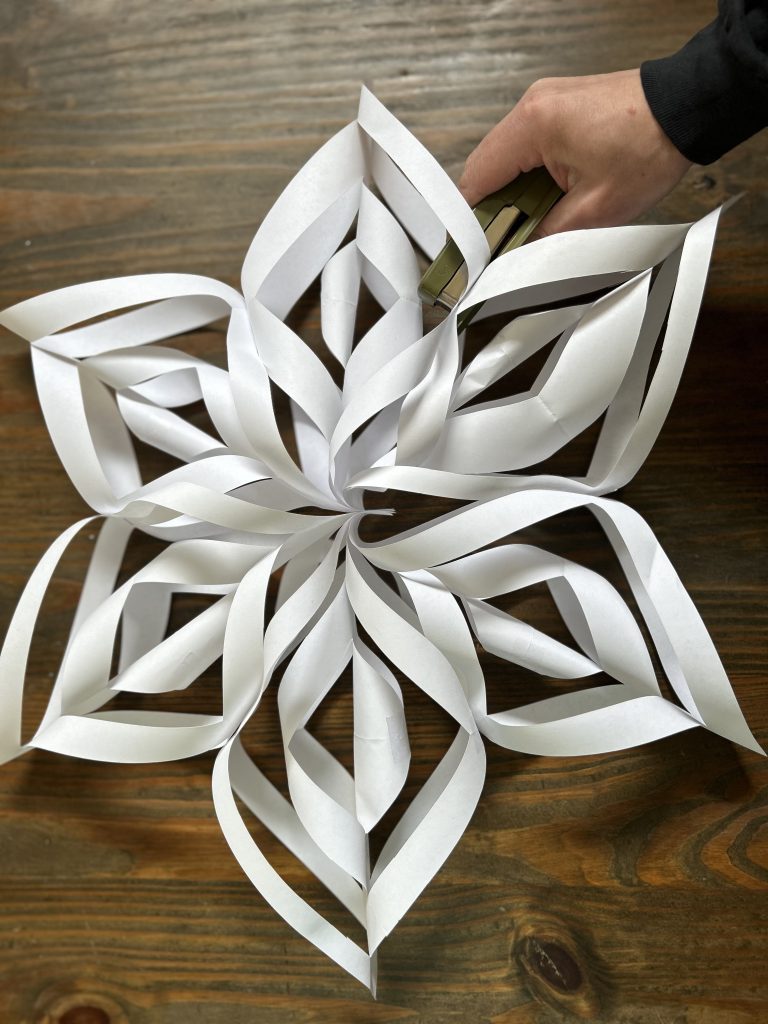
- Staple the sides of each snowflake section together where the sides form an “X,” rotating around the snowflake.
Step 12: Display your snowflake!

Ways to adapt your snowflakes.
- Make more diagonal cuts to each snowflake section.
- Add more snowflake sections to staple together.
- Make bigger or smaller snowflakes by adjusting the size of the square pieces used to form each snowflake section.
- Use colored paper to add variety.
- Sparkle things up with glitter.
- Use your imagination and have fun!
No responses yet